How to Draw Panna Cotta in Procreate
By Julia White — painted in Procreate with Brusher brushes · Updated October 2026
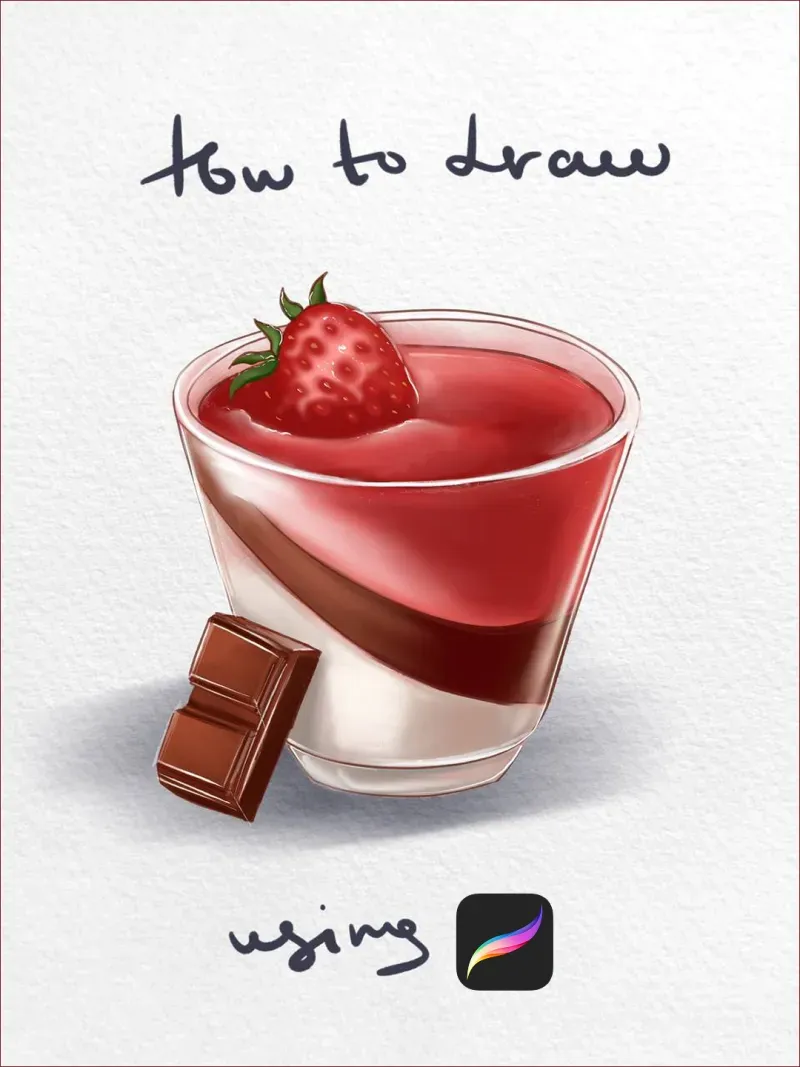
Everything difficult about this subject is in one place: the glass. Cream, chocolate and strawberry layers are just three flat bands of colour — the challenge is that you can see all of them through a transparent wall, and the wall itself has almost no colour of its own.
The trick is that you never really paint the glass. You paint what's behind it, then add a handful of highlights along the rim and edges — and the eye assembles the glass by itself. Nine steps, and the last three are what make it look like glass rather than a painted cup.
Step by step
- 1
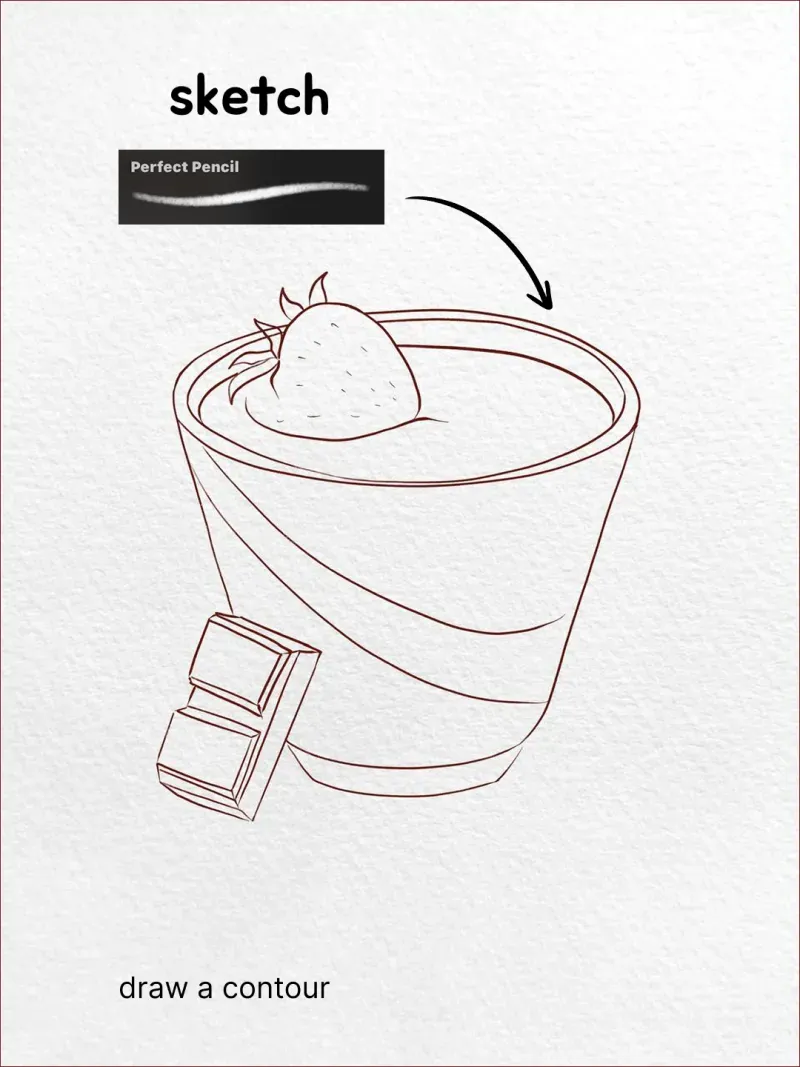
Draw the contour Perfect Pencil
Sketch the glass as a simple tapered cup, then draw the layer boundaries as curves that dip in the middle — a layer seen through a round glass never sits as a straight line. Add the strawberry on top and the chocolate square leaning at the side.
- 2
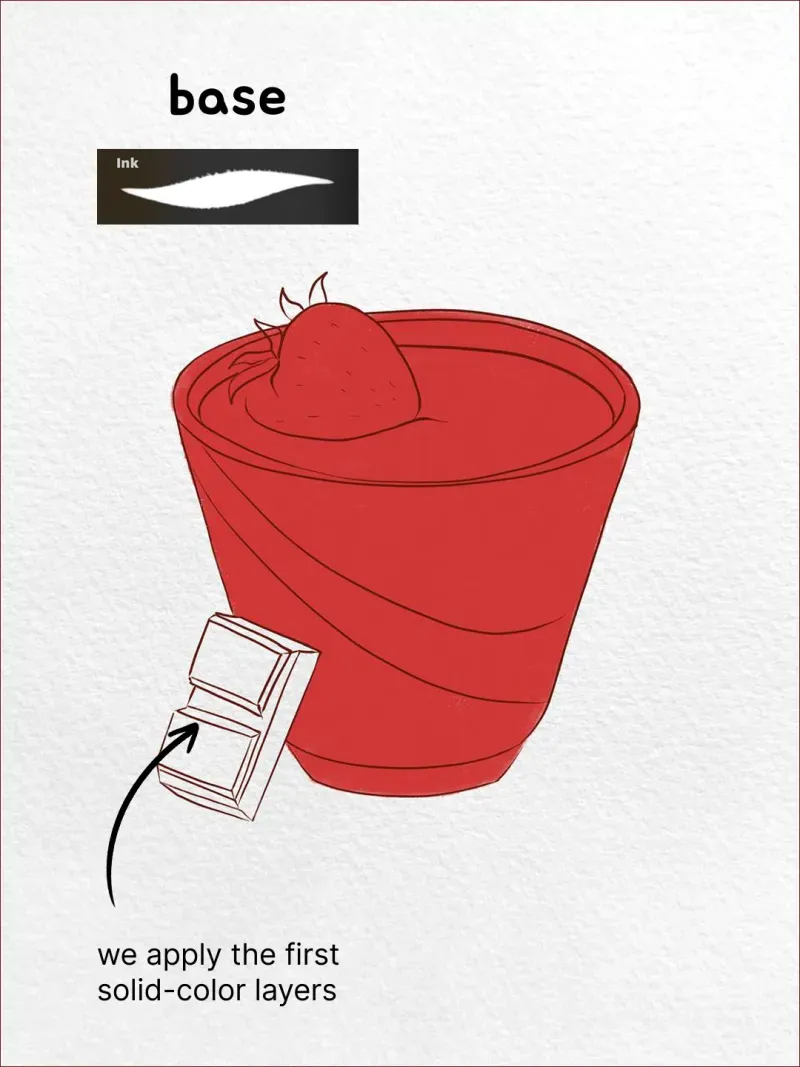
Fill the first flat colours Ink
Block the whole dessert in one flat red on its own layer, ignoring the layers for now. Starting with a single silhouette keeps the outline clean — it's much easier to divide a solid shape into bands later than to line up three separate shapes edge to edge.
- 3
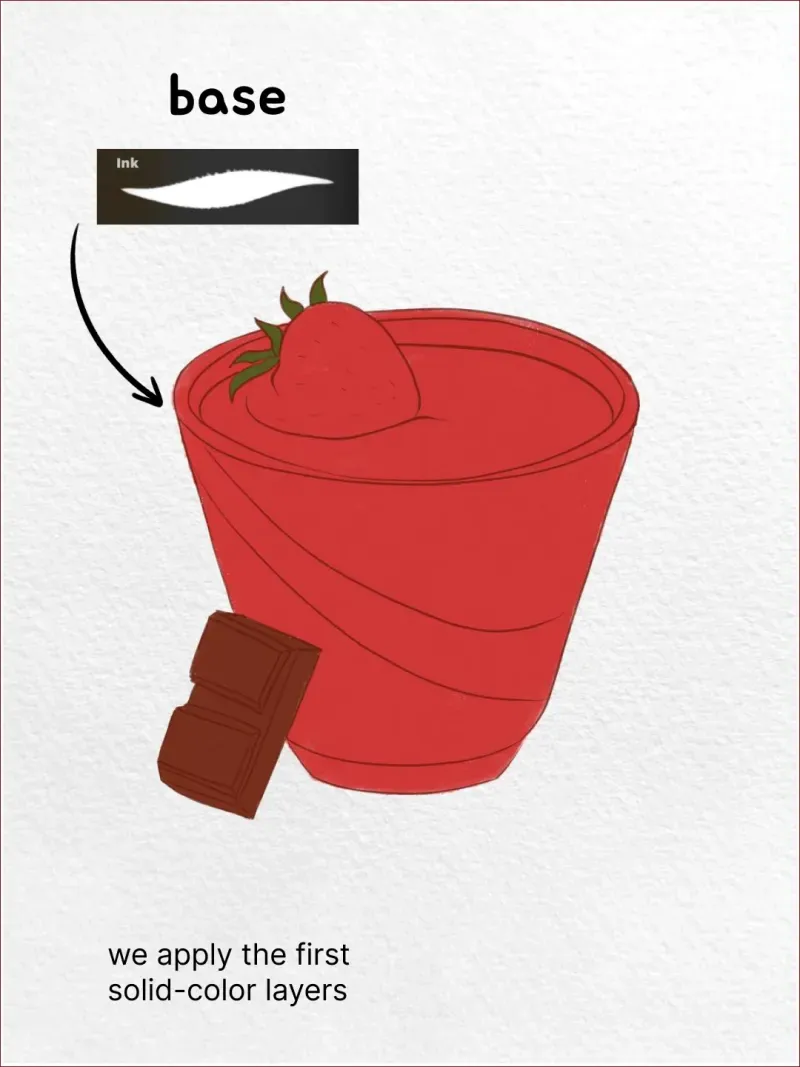
Fill the remaining elements Ink
Give the chocolate square its own flat brown. Keep every element on a separate layer from the start: the glass, the filling and the chocolate all get lit differently later, and separating them now saves redrawing.
- 4
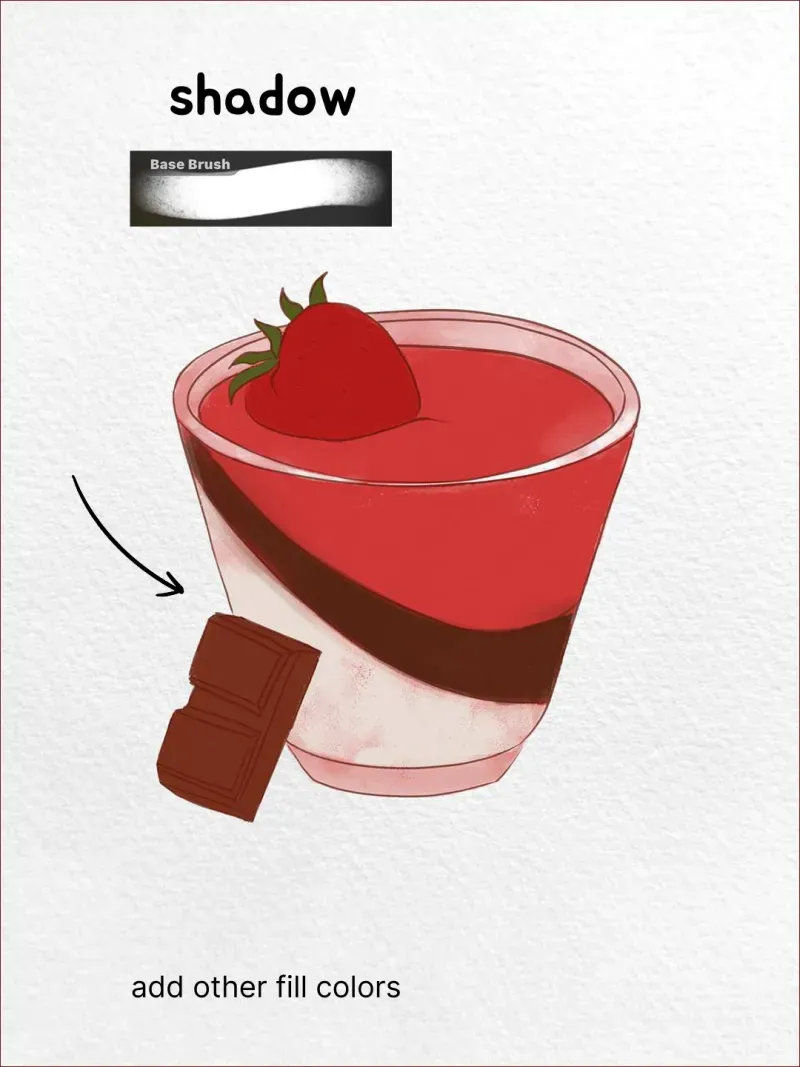
Separate the layers Base Brush
Now divide that red silhouette into its bands — pale cream at the bottom, a dark chocolate stripe, strawberry red on top. Follow the curved boundaries from the sketch. This one step is what turns a red cup into a dessert with contents.
- 5
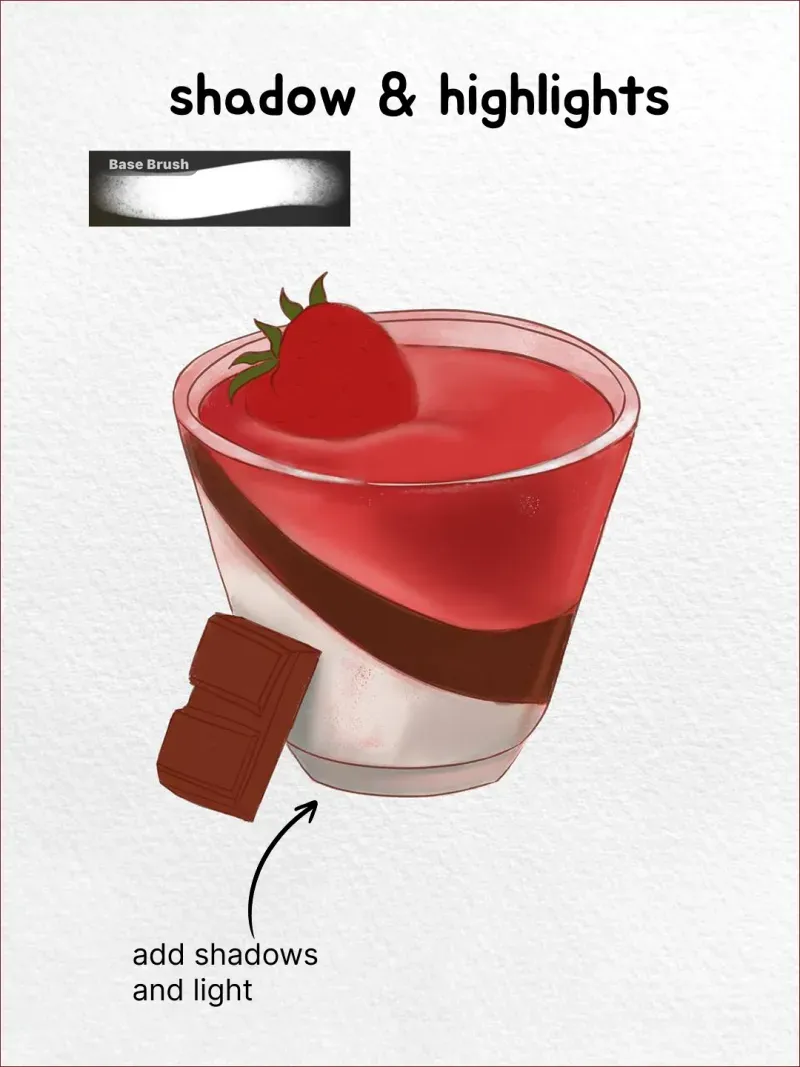
Add shadows and light Base Brush
Pick a light direction and shade each band on its own layer — darker where the glass curves away, lighter where it faces the light. Shade the bands independently: cream, chocolate and jelly reflect light differently, and treating them as one object flattens the whole thing.
- 6
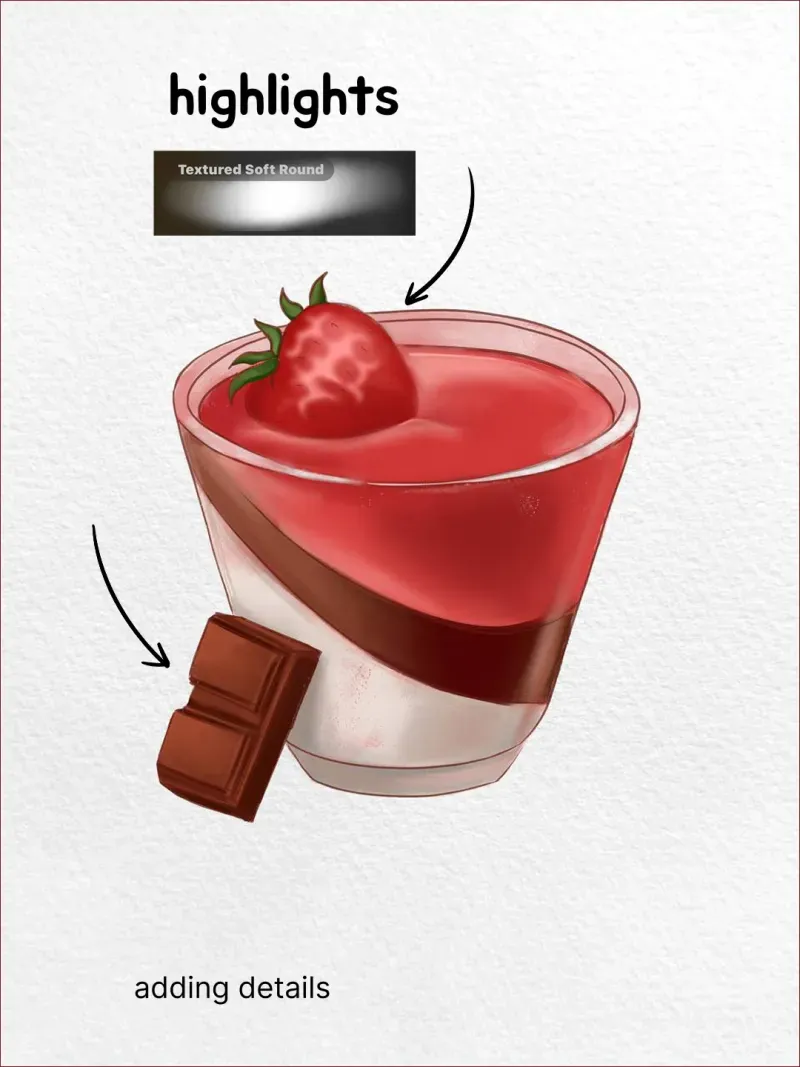
Work the glass surface Textured Soft Round
Add soft vertical shading down the sides of the glass and a subtle pink cast where the strawberry layer bleeds through onto the cream below. This is the first step that says «glass» rather than «cup» — light passing through colour, not sitting on top of it.
- 7
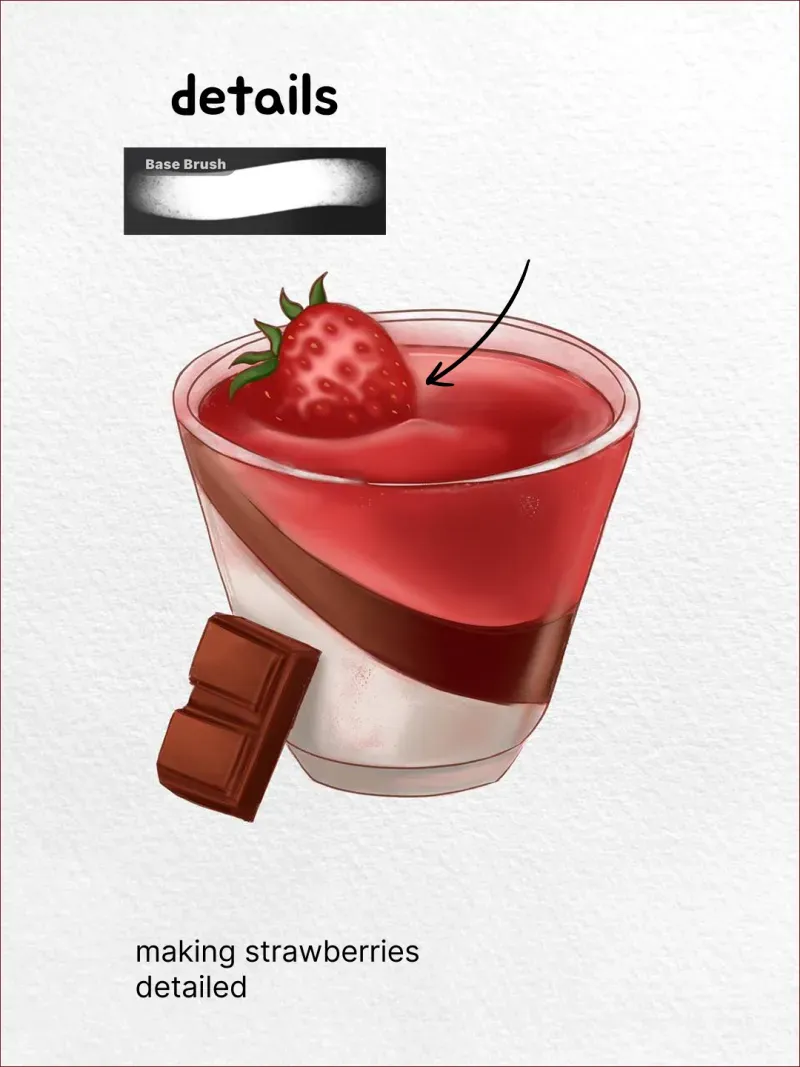
Detail the strawberry Base Brush
Give the berry its seeds, a darker underside where it sinks into the jelly, and a bright top. It's the smallest object in the picture and the one the eye lands on first, so it can carry more detail than everything else combined.
- 8
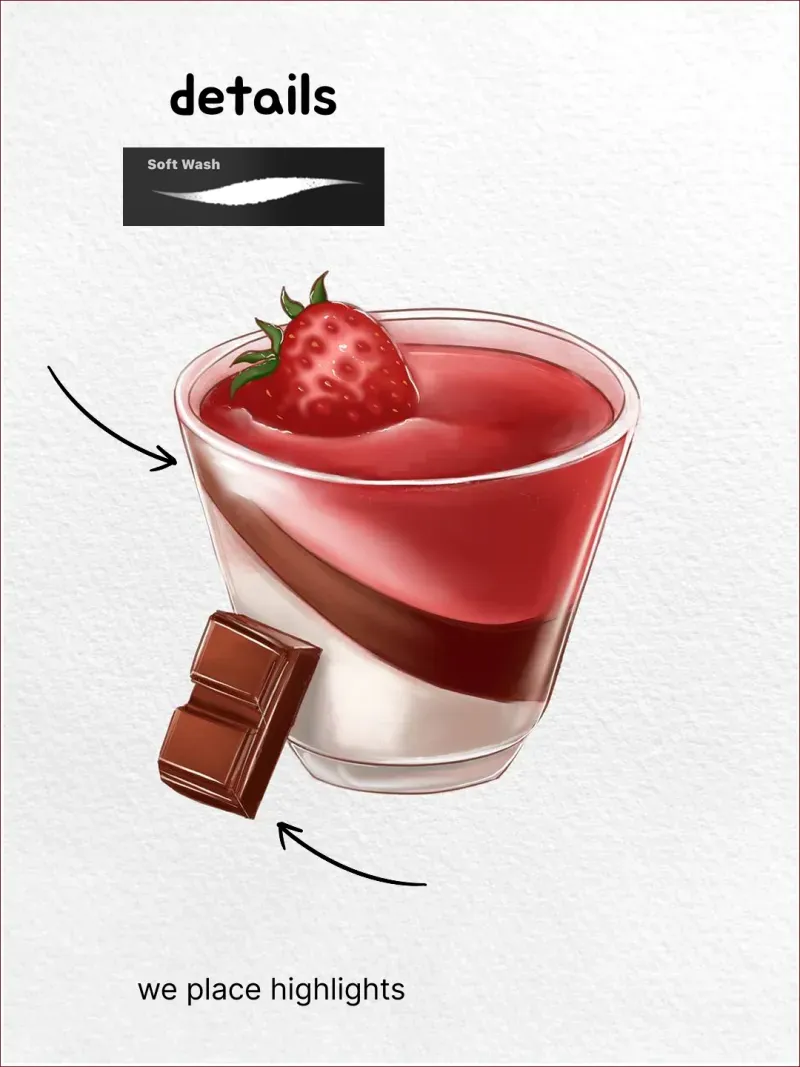
Place the highlights Soft Wash
Now the glass itself: a bright line along the rim, a soft vertical streak down one side, a small catch of light on the chocolate square. Keep them few and deliberate. Highlights on the rim and edges are what the brain reads as a transparent wall — without them, the layers just look painted onto a flat shape.
- 9
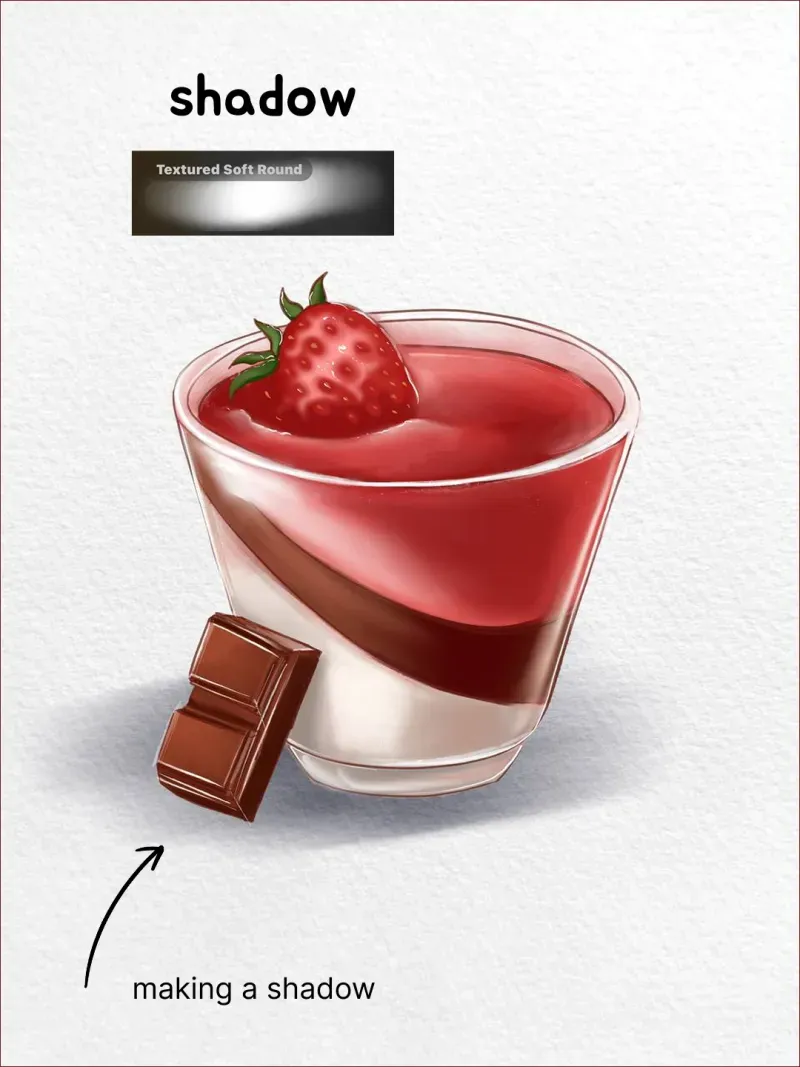
Cast a shadow Textured Soft Round
Finish with a soft shadow under the glass, spreading away from the light. Keep it lighter than you'd expect — glass lets light through, so its shadow is thinner and more diffuse than the shadow of a solid object the same size.
Brushes used
Painted with brushes from the ArtFable and Watercolor sets. They're both in the Brusher app. For the washes and grains used throughout, browse our watercolour Procreate brushes — wet-on-wet, dry-brush and wash behaviours, installed in one tap.
Want to build the brush yourself instead? Our guide on making your own Procreate brush includes a five-step watercolour recipe.
Frequently asked questions
How do you draw glass in Procreate?+
You mostly don't draw the glass — you draw what's behind it, then add a few highlights on the rim and edges. A bright line along the rim, one soft streak down the side, and a hint of colour bleeding between layers is usually enough. Drawing a hard outline for the glass itself is what makes it read as a solid cup instead.
Which brushes do I need for this tutorial?+
Four: a pencil for the sketch, an inking brush for the flat fills, a soft base brush for shading, and a soft wash for the highlights. A textured soft round handles the glass surface and the cast shadow. Any set with a clean fill brush, a soft blender and a wash will cover it.
Why do my layers look painted on instead of inside the glass?+
Two usual causes. The layer boundaries are drawn as straight lines — through a round glass they should curve and dip in the middle. And there's no colour bleed: a red layer above a white one tints it slightly. Curve the boundaries, add that bleed, and the contents drop behind the glass wall.
Do I need a lot of layers for this?+
Around six is plenty — glass, each of the three filling bands, the strawberry and the chocolate. The point isn't the count but the separation: each material gets lit differently, and merging them early forces you to repaint when the lighting changes.