How to Make Your Own Procreate Brush
By the Brusher team — we make the brushes, so we know how they install · Updated July 2026
Want a stamp from your own picture without touching Brush Studio? Our free Procreate stamp brush maker turns any image into a stamp brush right in the browser.
Making your own Procreate brush turns any shape, texture or drawing into a reusable tool — a custom stamp, a textured pencil, a foliage scatter, whatever you need. Every brush in Procreate is built from just two ingredients: a Shape source (the silhouette of the mark) and a Grain source (the texture that fills it). Once you understand those two, the whole Brush Studio makes sense. Procreate documents every panel in its own Brush Studio handbook if you want the reference alongside this walkthrough.
This tutorial walks through building a brush from a blank canvas, from creating your source image the right way to dialling in the settings and saving a shareable .brush file.
You'll need
- ✓Procreate on iPad
- ✓A shape source (a photo, scan or drawing)
- ✓Optional: a grain texture for surface detail
Shape source vs grain source
Before you touch a setting, understand the two images every brush combines. The Shape is the outline of a single stamp of the brush — a circle gives you a normal round brush, a leaf gives you a leaf stamp, a splatter gives you a spatter brush. The Shape is what Procreate repeats along your stroke.
The Grain is the texture that shows inside that shape — paper tooth, canvas weave, noise, or nothing at all for a clean brush. Think of the Shape as a stencil and the Grain as the ink you dab through it. Almost every brush you love is just a clever pairing of these two.
Build your brush, step by step
- 1
Create a new brush set and brush
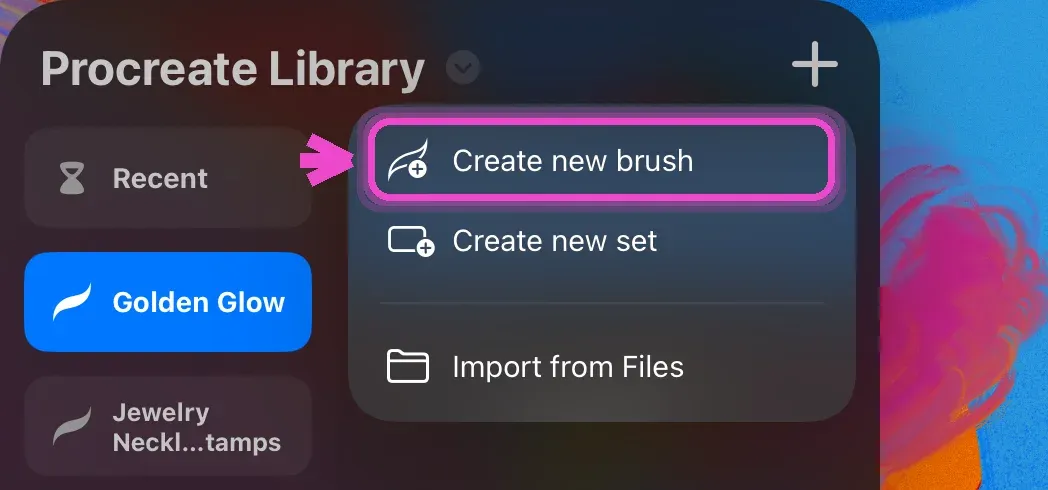
In Procreate's brush library, tap the + at the top-right and choose Create new brush — Brush Studio opens with a fresh, blank brush ready to define.
- 2
Make your source image
Work on a square, 1:1 canvas and draw the mark in white on a transparent (or black) background — Procreate reads white as the visible part of the brush and black as empty. Keep edges crisp, then export as a PNG with transparency.
- 3
Import your Shape
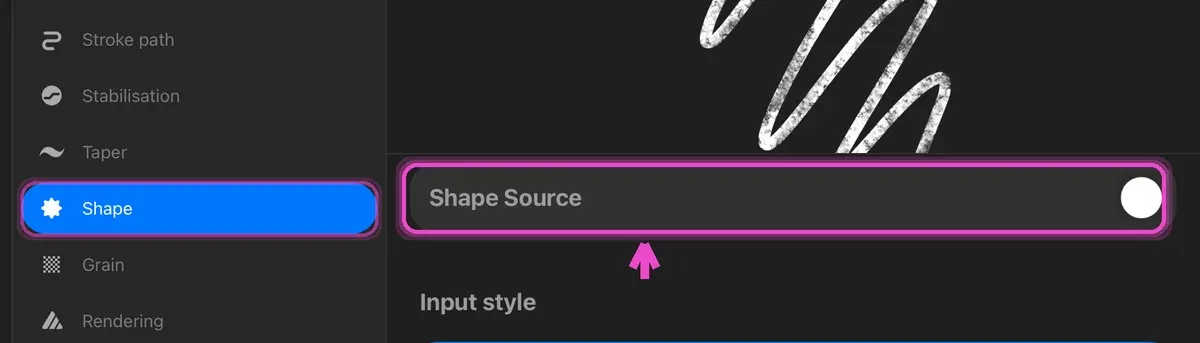
In Brush Studio open the Shape tab and tap Shape Source → Edit → Import to load your PNG. This sets the silhouette of every stamp the brush lays down.
- 4
Import your Grain
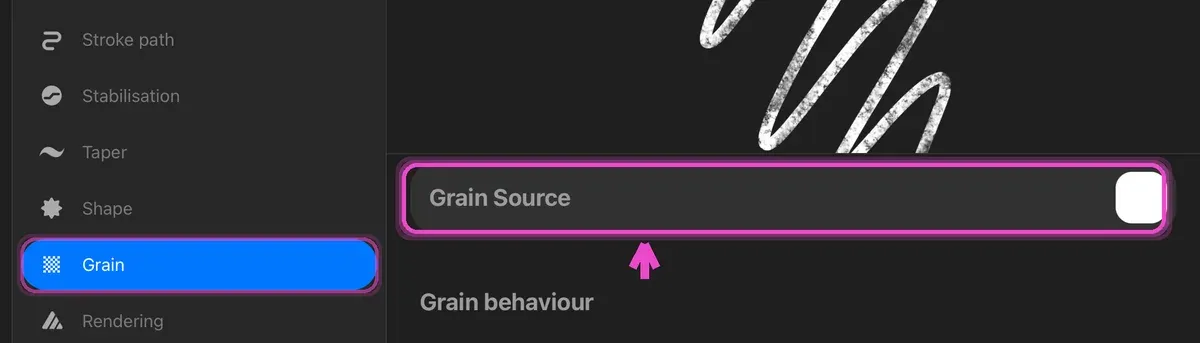
Open the Grain tab and tap Grain Source to import a texture that controls the surface detail. Leave it plain for a smooth brush, or import paper or canvas for a natural-media feel.
- 5
Dial in the settings
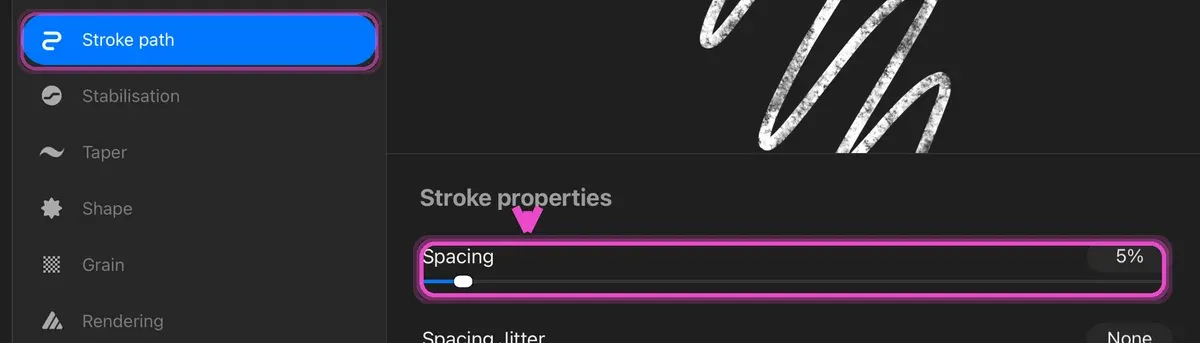
In the Stroke Path tab set Spacing (how far apart stamps sit) and StreamLine (smoothing). In Apple Pencil map Pressure to Size and Opacity so the brush responds to how hard you press. Adjust Taper and Jitter to taste.
- 6
Test on the canvas
Use the drawing pad on the left of Brush Studio, or tap Done and scribble on a real canvas. Go back and tweak Spacing, Flow and pressure until the stroke feels right.
- 7
Save, name and share
Name the brush at the top of Brush Studio and tap Done. To share it, swipe left on the brush in your library and tap Share to export a .brush file others can import.
What kinds of brushes can you make?
Once you understand Shape and Grain, the same seven steps make almost anything. A stamp brush comes from a single crisp silhouette with high Spacing — a leaf, a star, a logo — so each tap places one clean mark. A textured drawing brush pairs a soft round shape with a paper or canvas Grain and low Spacing for a natural pencil or charcoal feel.
A scatter brush — think foliage, confetti or stars strewn along a stroke — is a stamp with high Spacing plus Jitter and Rotation added in the settings. And a texture stamp for backgrounds is just a large grungy shape you drag across a whole layer. Every one of these is the same recipe with different sources and spacing, which is why building your own quickly becomes second nature.
How to make a watercolor brush in Procreate
Here's the whole recipe on a real example — and it's a good illustration of the point above, because you don't draw a single new Shape or Grain. Procreate's stock Tinderbox inker already has the rough, broken edge watercolor needs; all that's missing is the way it lays down pigment. Change four settings and it stops behaving like ink and starts behaving like a wet wash.
Work on a duplicate, never the original — that way the stock brush stays intact and you can start over at any point.
- 1
Duplicate the Tinderbox brush
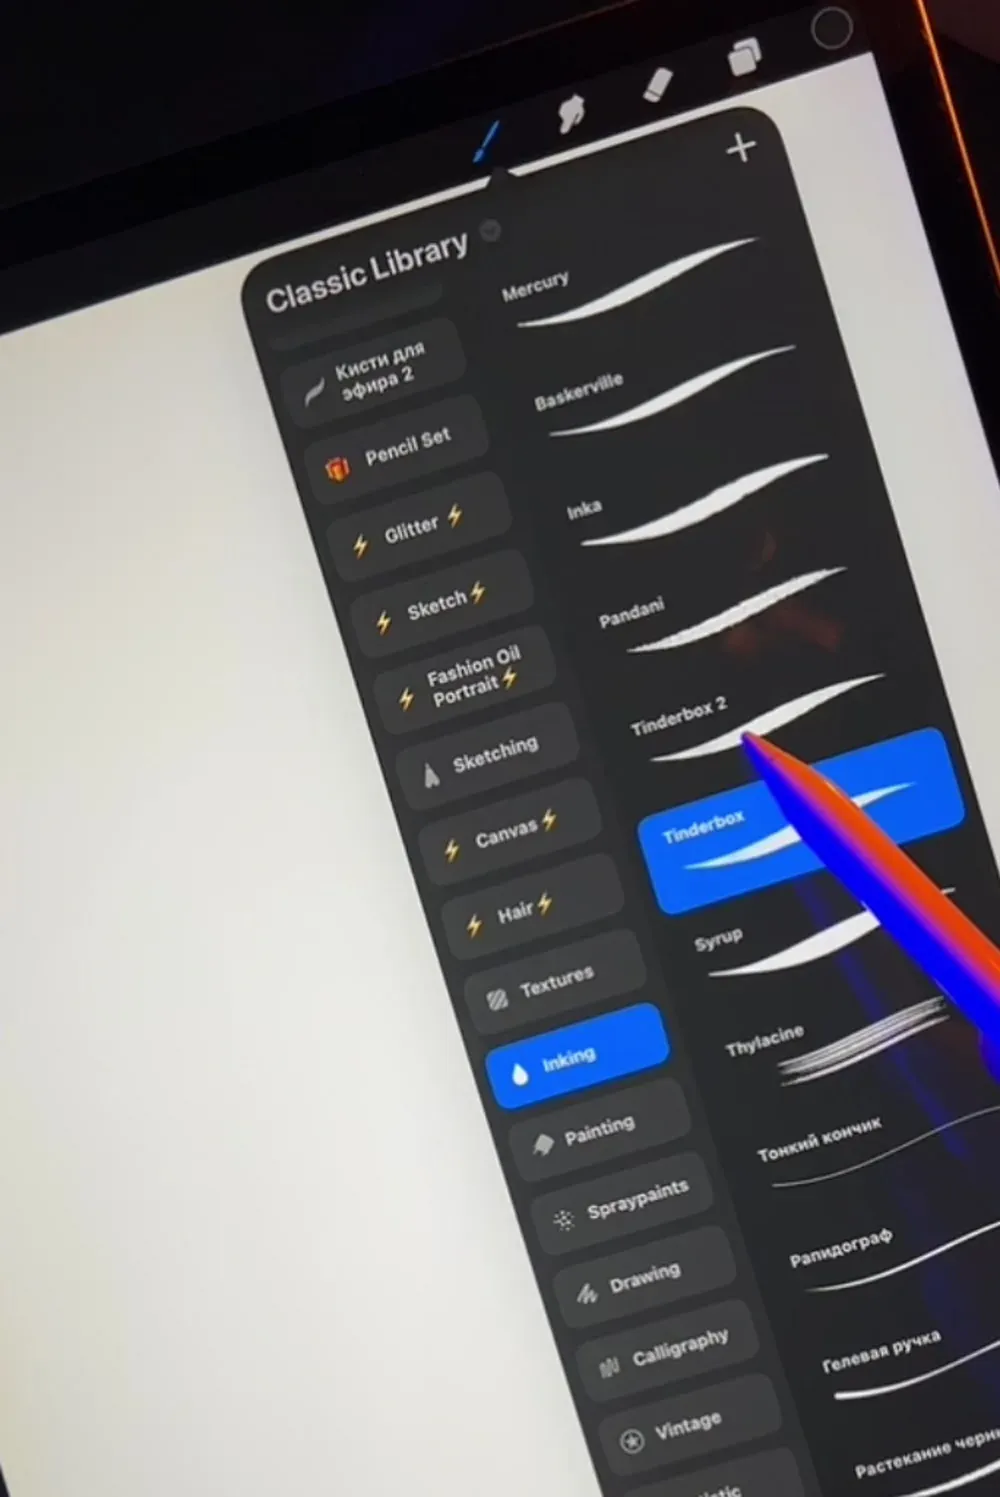
Open your Brush Library and go to the Inking set. Swipe left on Tinderbox and tap Duplicate, then open the copy to edit it in Brush Studio.
- 2
Max out Burnt edges, drop Wet edges to ~15%
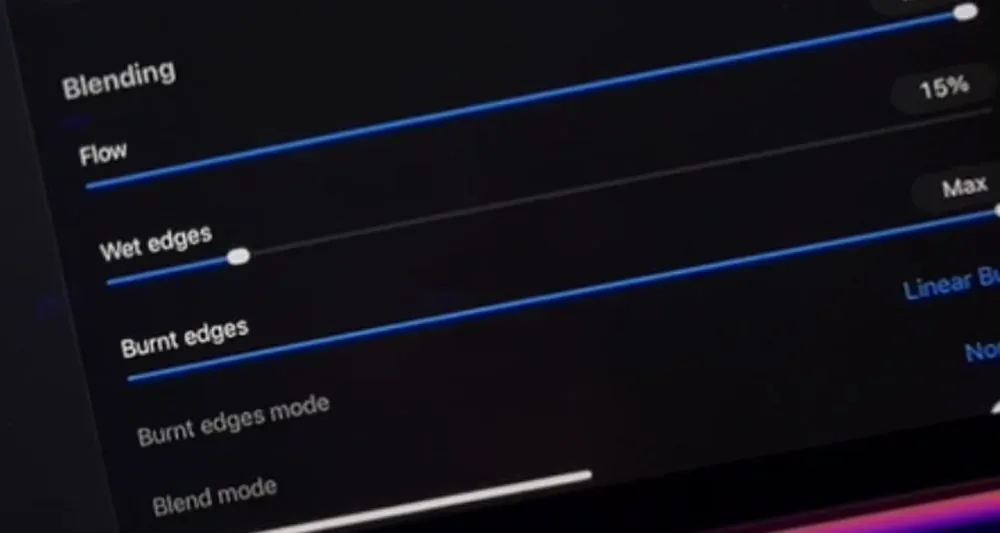
In the Rendering tab, push Burnt edges all the way up — this is what pools pigment at the border of a stroke and gives you that darker watercolor rim. Then bring Wet edges down to around 15%, and set Burnt edges mode to Linear Burn so the edge darkens instead of washing out.
- 3
Switch the Rendering mode to Light Glaze
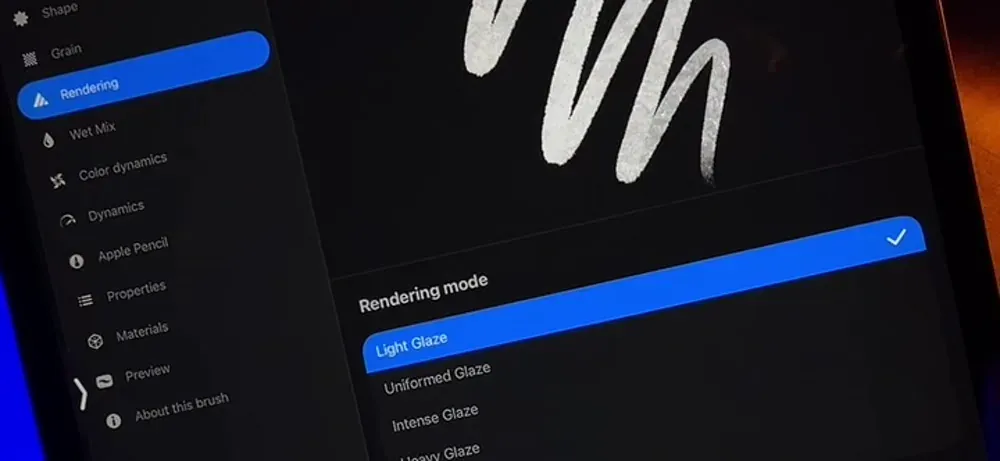
Still in Rendering, change the mode from Uniformed Glaze to Light Glaze. This is the setting that makes strokes build up transparently — layer two passes and the tones mix optically, exactly the way real washes glaze over each other.
- 4
Push Maximum size to the top
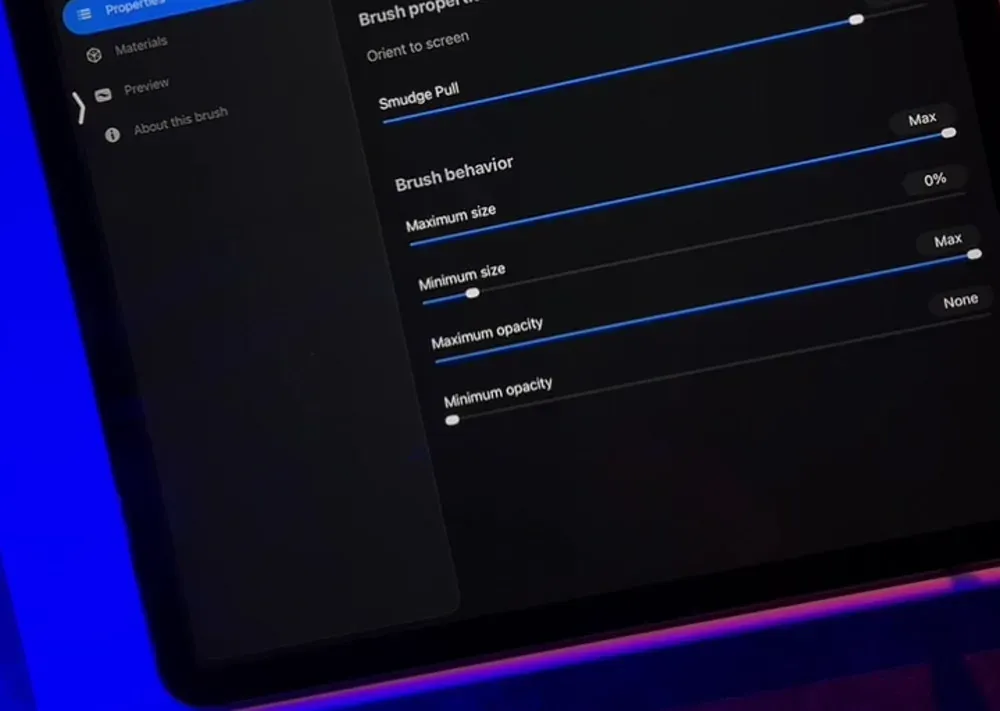
Open the Properties tab and drag Maximum size all the way up. Watercolor is painted in broad washes, not thin lines — without the extra size ceiling the brush still behaves like an inking pen.
- 5
Tap Done and test the stroke
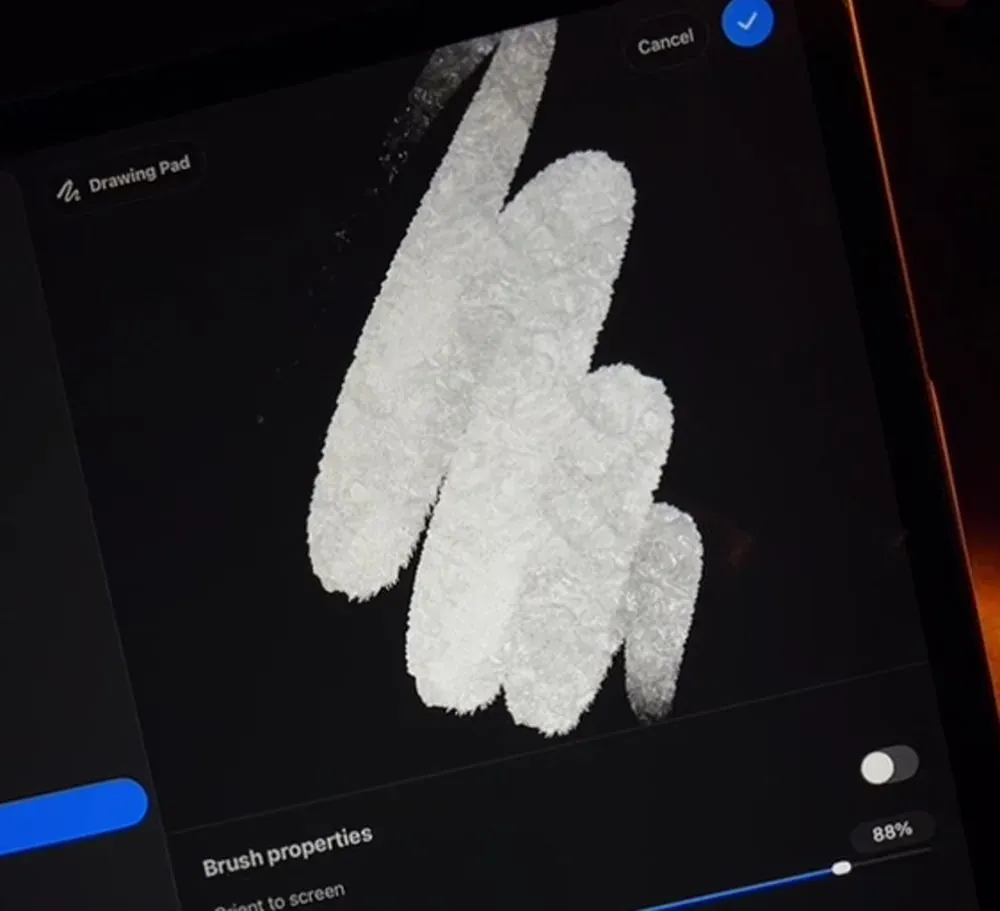
Scribble on the drawing pad before you leave Brush Studio. You should see a soft, grainy wash with a visibly darker edge. If it looks too heavy, ease Burnt edges down slightly; if the edge disappears, raise it.
Tips for better custom brushes
- 💡High contrast wins: a crisp black-on-white (or white-on-transparent) source imports far cleaner than a soft, grey, low-contrast image.
- 💡Start from an existing brush you like — duplicate it, swap the Shape or Grain, and you skip most of the setup.
- 💡Lower the Spacing for a smooth continuous stroke; raise it to turn the same shape into a stamp or scatter brush.
- 💡Save often-used custom brushes into their own set so they don't get lost among the defaults.
- 💡Watercolor brushes read as traditional media the moment you put a paper texture on a layer underneath — the grain shows through the transparent washes.
- 💡Don't want to build one from scratch? Our watercolor brush packs ship wet-on-wet, dry-brush and wash behaviours already tuned.