How to Install Procreate Brushes
By the Brusher team — we make the brushes, so we know how they install · Updated July 2026
Installing Procreate brushes means getting a .brushset into your library so it stays there permanently, ready whenever you paint. It's a quick process — a single tap in most cases — but there's a faster drag-and-drop method too, plus a few things worth knowing about organizing and troubleshooting.
"Install", "import" and "add" all describe the same thing here — getting the brush into Procreate. Here's the reliable way to add brushes to Procreate, how to put a whole set into your library, keep them tidy, and what to do when a set doesn't appear.
You'll need
- ✓An iPad with Procreate installed
- ✓Your .brushset file, saved in the Files app
Install a brush set step by step
Here's the whole process on a real iPad, from download to painting — six taps, no computer needed. We're using our Golden Glow set as the example, but it's identical for any .brushset.
- 1
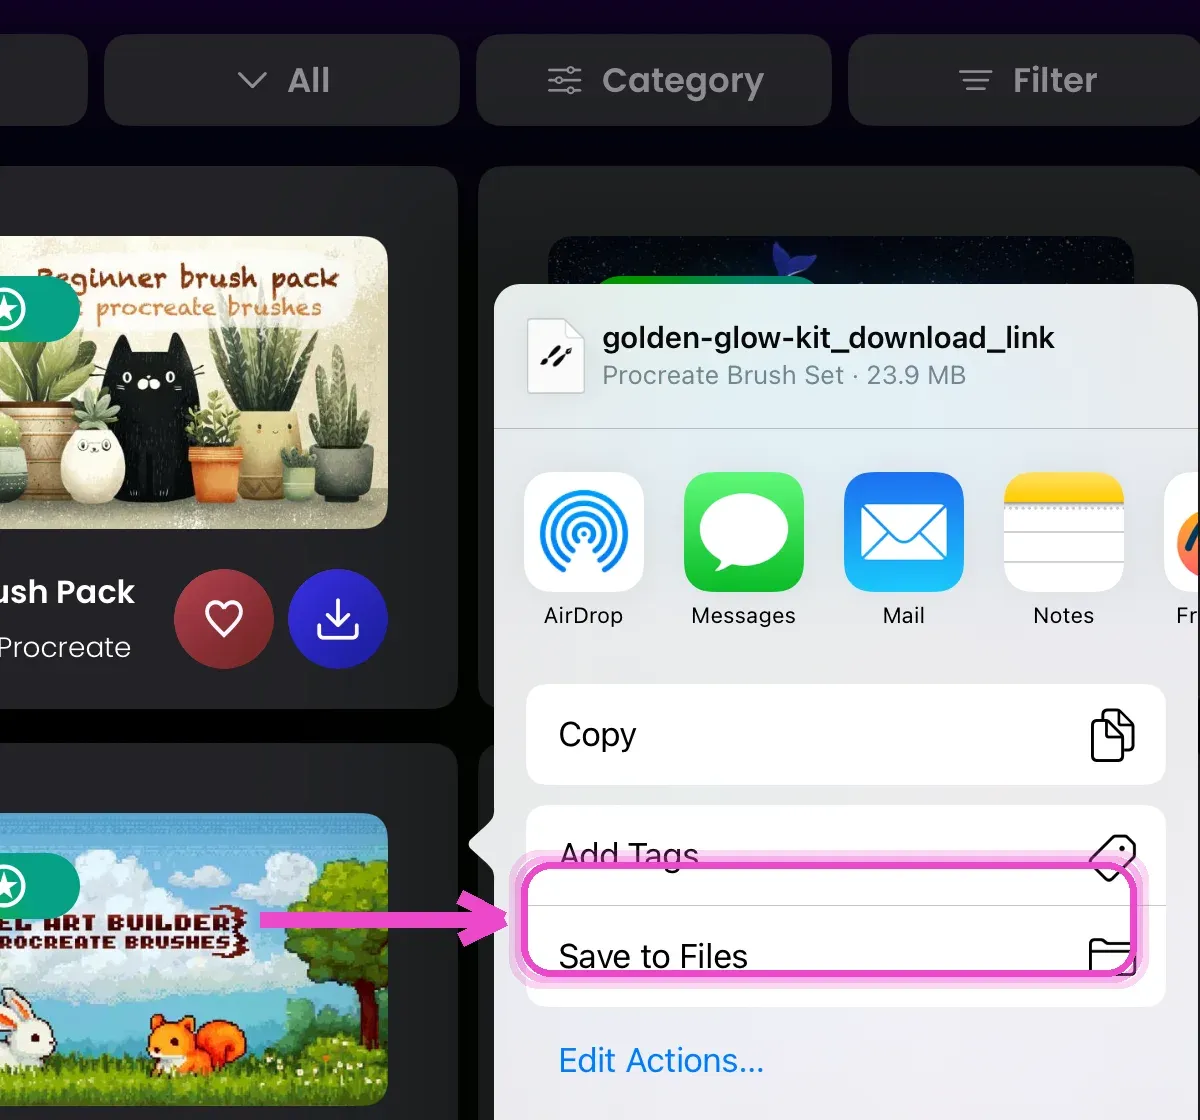
Save the download to Files
In the Brusher app (or your browser), tap the download / share button and choose Save to Files.
- 2
Pick a location and save
Choose On My iPad (or any folder you'll remember), then tap Save in the top-right corner.

- 3
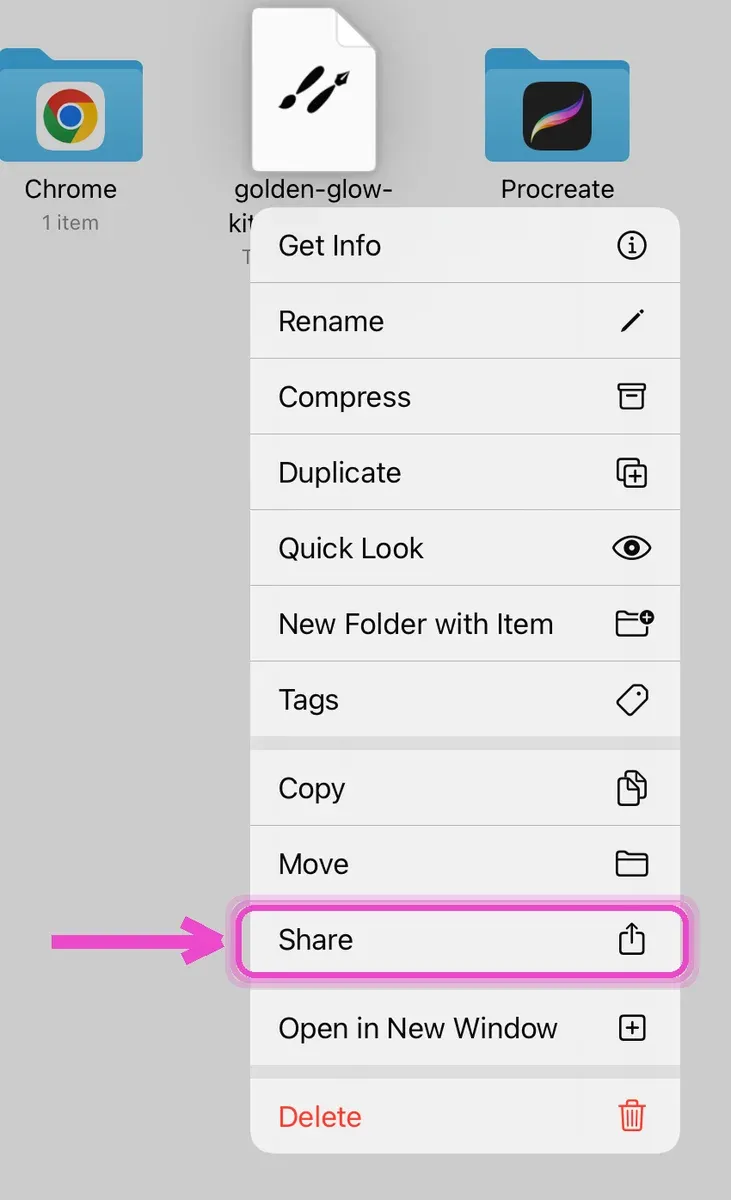
Open Files and share the set
Open the Files app, press and hold the .brushset file, and tap Share in the menu.
- 4
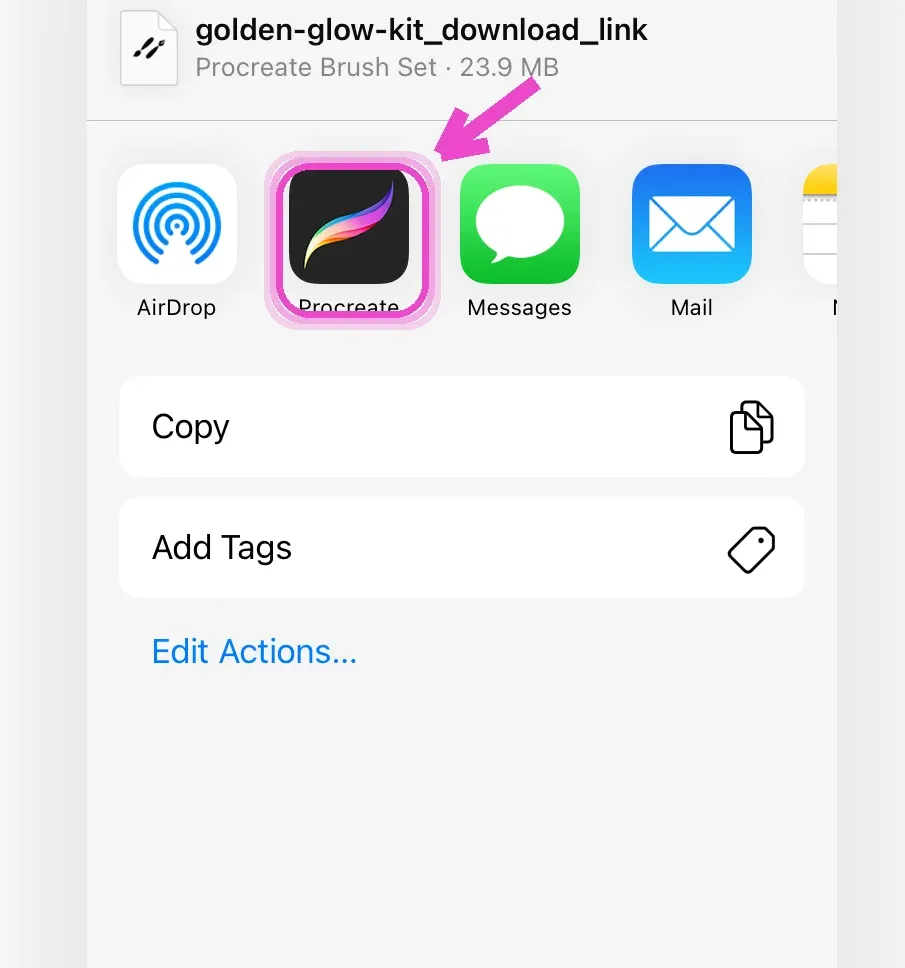
Send it to Procreate
In the share sheet that appears, tap the Procreate icon.
- 5
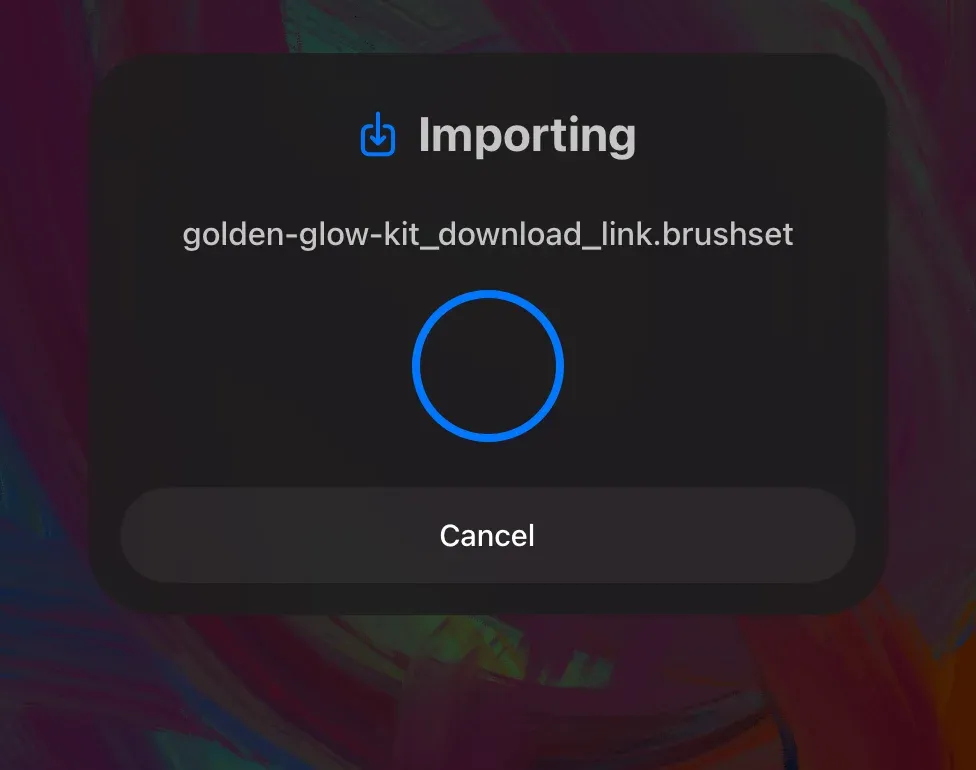
Let Procreate import it
Procreate opens and shows an Importing progress ring — give it a moment to finish.
- 6
Find it in your Brush Library
Tap the brush icon: your new set sits at the top of the library, installed and permanent until you remove it.
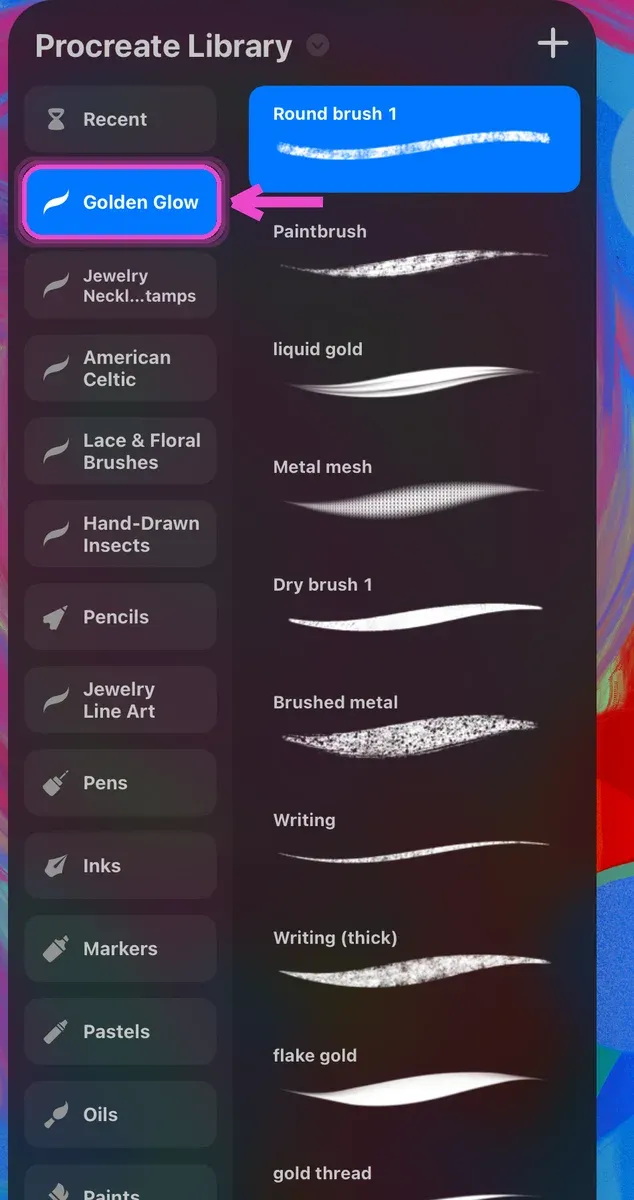
- 💡Even quicker: tapping a .brushset once in Files often opens Procreate and installs it directly — use the Share method above whenever a tap only previews the file.
Install via Split Screen (drag and drop)
If you're installing several sets, drag-and-drop is quicker. Open Procreate and the Files app side by side using Split Screen, then drag the .brushset straight into the brush panel.
In Procreate, open the brush library and keep it visible. Drag the .brushset from Files and drop it onto the brush panel — a green + appears where it will land. Release, and the set installs instantly. This is also how you drop a single loose .brush into an existing set instead of importing a whole new one.
Organize your brushes into sets
A tidy library saves time mid-drawing. Press and hold a brush set to drag it up or down the list, so your favourites sit at the top. Tap a set's name to rename it, and swipe left on individual brushes to duplicate, share or delete them.
You can also drag a single brush from one set into another to build your own custom working set — a handful of pencils, inkers and blenders you actually use, all in one place.
Troubleshooting: brushes not showing up
If a set won't appear, work through the usual causes. Make sure the file really ended in .brushset and not .zip — if it's a zip, tap it once in Files to extract it first, then install the .brushset inside. Procreate's official guide to importing brushes lists the file types it accepts, which rules out a bad file fast.
If brushes imported as loose individual brushes rather than a named set, they've been added to whichever set was open — scroll your current set to find them. And if nothing happens at all, confirm Procreate is up to date in the App Store, since older versions can reject newer files.